Kitchen Tap Handle Turns All the Way Around: How to Fix It
Discovering that your kitchen tap handle turns all the way around can be frustrating. It often indicates a problem within the tap’s internal mechanisms, usually affecting the valve or cartridge. Understanding the cause and knowing how to address it can save you from costly plumbing bills. This article explores common reasons why your kitchen tap handle turns all the way around and provides a step-by-step guide on how to fix it.
Understanding the Problem: Why Your Tap Handle Rotates Excessively
Several factors can cause a kitchen tap handle to spin uncontrollably. Identifying the root cause is crucial for effective repair. Here are the most common culprits:
- Worn-out Cartridge: Cartridge taps use a cartridge to control water flow. Over time, the cartridge can wear out, causing the handle to loosen and turn freely. This is one of the most frequent reasons why a kitchen tap handle turns all the way around.
- Damaged Valve: In older taps, valves control the water flow. If the valve is damaged or the rubber washers are deteriorated, it can lead to the handle spinning.
- Loose Screw or Fastener: The handle is secured to the valve stem or cartridge with a screw or fastener. If this screw becomes loose, the handle will lose its grip and rotate freely.
- Corrosion or Mineral Buildup: Over time, mineral deposits or corrosion can accumulate within the tap, hindering its proper function and causing the kitchen tap handle to become loose.
- Stripped Splines: The splines on the valve stem or cartridge and the corresponding splines inside the tap handle can wear down or strip. This prevents the handle from properly engaging and results in it turning all the way around.
Tools and Materials You’ll Need
Before you begin, gather the necessary tools and materials:
- Adjustable Wrench: For loosening and tightening nuts and fittings.
- Screwdrivers (Phillips and Flathead): To remove screws and access internal components.
- Pliers: For gripping and manipulating small parts.
- Replacement Cartridge or Valve: If the existing one is damaged or worn. Make sure to get the correct replacement part for your specific tap model.
- Penetrating Oil: To loosen corroded parts.
- White Vinegar: To dissolve mineral buildup.
- Clean Cloths or Rags: To wipe up spills and keep your workspace clean.
- Plumber’s Grease: To lubricate moving parts.
Step-by-Step Guide: Fixing a Kitchen Tap Handle That Turns All the Way Around
Follow these steps to diagnose and fix the issue:
Step 1: Turn Off the Water Supply
Before you start any plumbing work, turn off the water supply to the tap. Locate the shut-off valves under the sink and turn them clockwise until they are completely closed. If you don’t have individual shut-off valves, you may need to turn off the main water supply to your house. Run the tap to relieve any remaining pressure in the lines.
Step 2: Inspect the Handle and Fasteners
Start by examining the handle itself. Look for any visible damage or looseness. Check the set screw that secures the handle to the valve stem or cartridge. This screw is often located on the side or underneath the handle, sometimes concealed by a small cap. Use an appropriate screwdriver to tighten the set screw. If the screw is stripped or damaged, you may need to replace it.
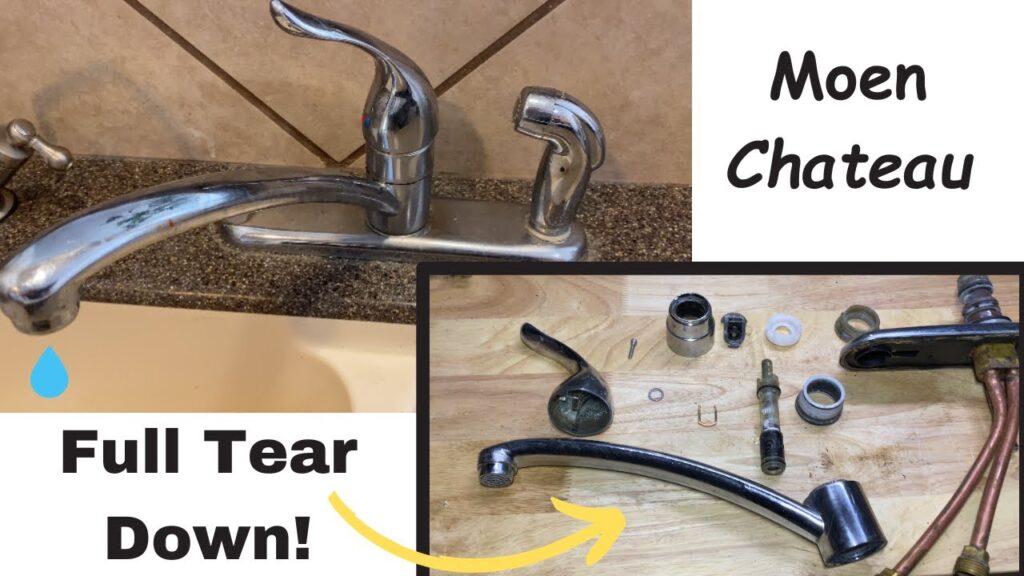
Step 3: Remove the Handle
If tightening the set screw doesn’t solve the problem, you’ll need to remove the handle to access the internal components. Depending on the tap design, you may need to pry off a decorative cap to reveal the screw. Use a small flathead screwdriver to gently pry the cap off. Once the screw is exposed, remove it and carefully pull the handle off the tap.
Step 4: Inspect the Cartridge or Valve
With the handle removed, you can now inspect the cartridge or valve. Cartridge taps typically have a cylindrical cartridge held in place by a retaining clip or nut. Valve taps, on the other hand, usually have a valve stem with a rubber washer at the end. Look for any signs of damage, wear, or corrosion on the cartridge or valve.
Step 5: Remove and Replace the Cartridge or Valve
If you suspect that the cartridge or valve is the problem, remove it. For cartridge taps, remove the retaining clip or nut and carefully pull out the cartridge. For valve taps, unscrew the valve stem. Take the old cartridge or valve to a plumbing supply store to ensure you get the correct replacement. Install the new cartridge or valve in the reverse order of removal. Lubricate the O-rings with plumber’s grease before installation.
Step 6: Address Mineral Buildup
Mineral buildup can hinder the proper functioning of the tap. If you notice mineral deposits, soak the affected parts in white vinegar for a few hours to dissolve the buildup. Use a soft brush to scrub away any remaining deposits. Rinse the parts thoroughly with water before reassembling the tap.
Step 7: Reassemble the Tap
Once you have replaced the cartridge or valve and addressed any mineral buildup, reassemble the tap. Place the handle back onto the valve stem or cartridge and secure it with the screw. Make sure the handle is properly aligned and tightened. Replace the decorative cap, if applicable.
Step 8: Test the Tap
Turn the water supply back on slowly and check for leaks. Operate the handle to ensure it turns smoothly and controls the water flow properly. If the kitchen tap handle turns all the way around is resolved, congratulations! If not, double-check your work or consult a professional plumber.
Preventive Measures to Avoid Future Issues
To prevent your kitchen tap handle from turning all the way around in the future, consider these preventive measures:
- Regular Maintenance: Periodically check the handle and fasteners for looseness. Tighten any loose screws or nuts.
- Water Softener: If you live in an area with hard water, consider installing a water softener to reduce mineral buildup in your plumbing fixtures.
- Gentle Operation: Avoid applying excessive force when turning the tap handle. This can damage the internal components.
- Quality Parts: When replacing parts, opt for high-quality replacements that are designed to last.
When to Call a Plumber
While many kitchen tap handle issues can be resolved with DIY repairs, there are times when it’s best to call a professional plumber:
- Extensive Damage: If the tap is severely damaged or corroded, it may be beyond repair.
- Complex Plumbing: If you are not comfortable working with plumbing, it’s best to leave the job to a professional.
- Persistent Leaks: If you are unable to stop leaks after attempting repairs, a plumber can diagnose and fix the problem.
Conclusion
A kitchen tap handle that turns all the way around is a common problem that can often be fixed with a few simple steps. By understanding the underlying causes and following the instructions in this guide, you can save money on plumbing repairs and keep your tap functioning smoothly. Remember to always turn off the water supply before starting any plumbing work and to consult a professional if you are unsure about any aspect of the repair process. Addressing a kitchen tap handle issue promptly can prevent further damage and ensure the longevity of your tap.
[See also: How to Replace a Kitchen Tap Cartridge]
[See also: Troubleshooting Common Kitchen Tap Problems]
