How to Make a Firing Pin: A Comprehensive Guide
Crafting a firing pin might seem like a task reserved for seasoned gunsmiths, but with the right tools, knowledge, and a healthy dose of caution, it’s a project that can be undertaken by any mechanically inclined individual. This guide provides a detailed, step-by-step explanation of how to make a firing pin, covering everything from material selection to final fitting. Understanding the intricacies of firing pin construction is crucial for ensuring the safe and reliable operation of your firearm. A properly made firing pin is essential for igniting the cartridge primer, initiating the firing sequence. This article aims to provide a comprehensive look at the process of how to make a firing pin safely and effectively.
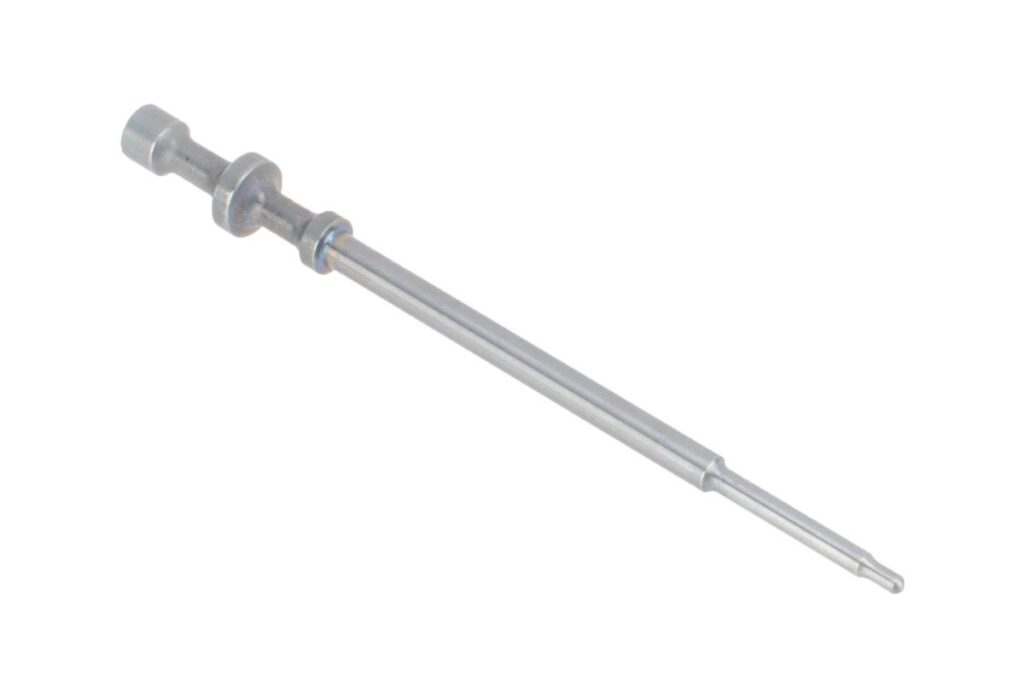
Understanding the Firing Pin
Before diving into the process of how to make a firing pin, it’s essential to understand its function and the different types available. The firing pin, also known as a striker, is a critical component in a firearm’s firing mechanism. When the trigger is pulled, the hammer or striker impacts the firing pin, which then strikes the primer of the cartridge, igniting the propellant and firing the bullet. There are primarily two types of firing pins: free-floating and inertia-driven.
- Free-Floating Firing Pins: These firing pins move freely within their channel and rely solely on the force of the hammer or striker to ignite the primer. They are common in many modern firearms.
- Inertia-Driven Firing Pins: These firing pins are shorter and lighter. They are designed to not protrude from the bolt face unless struck with sufficient force. This design helps prevent accidental discharges.
Knowing which type of firing pin your firearm uses is crucial for ensuring proper functionality and safety. Incorrectly made or installed firing pins can lead to malfunctions, misfires, or even dangerous accidental discharges.
Materials and Tools Needed
Choosing the right materials and tools is paramount when learning how to make a firing pin. The material must be strong, durable, and capable of withstanding repeated impacts and high pressures. Common materials include:
- Tool Steel: Such as O1, A2, or S7. These steels offer excellent hardness, wear resistance, and toughness. O1 is a good general-purpose option, while A2 provides better dimensional stability during heat treatment, and S7 offers exceptional shock resistance.
- High-Carbon Steel: Like 1095 steel, which can be hardened to a high degree.
The tools you’ll need include:
- Lathe: For shaping the firing pin to the correct dimensions.
- Mill (Optional): Can be used for certain features or for making the firing pin entirely.
- Calipers: For precise measurements.
- Files: For fine-tuning and finishing.
- Sandpaper: For polishing.
- Heat Treating Equipment: Including a furnace or torch and quenching oil for hardening the steel.
- Tempering Oven or Torch: For tempering the steel after hardening.
- Safety Glasses: Essential for eye protection.
- Gloves: To protect your hands.
Step-by-Step Guide: How to Make a Firing Pin
Step 1: Material Preparation
Start by selecting a piece of tool steel that is slightly larger than the final dimensions of the firing pin. This allows for machining and finishing. Ensure the steel is clean and free of any surface imperfections. Using a bandsaw or similar tool, cut the steel to the appropriate length.
Step 2: Machining the Basic Shape
Mount the steel blank in the lathe. Using appropriate cutting tools, begin shaping the firing pin to its basic form. This typically involves turning down the diameter of the steel to the required dimensions, as specified in the firearm’s schematics or by measuring the original firing pin. Pay close attention to the diameter of the tip, as this is a critical dimension for proper primer ignition.
Step 3: Creating the Firing Pin Tip
The tip of the firing pin is the most critical part. It must be precisely shaped and sized to ensure reliable primer ignition without piercing the primer. Use the lathe to carefully shape the tip. The exact shape will vary depending on the firearm, but it is typically either rounded or slightly pointed. Use calipers to verify the dimensions frequently. A small mistake here can lead to misfires or pierced primers.
Step 4: Adding Necessary Features
Many firing pins have additional features, such as a retaining groove or a flange. These features are essential for proper installation and function. Use the lathe or mill to add these features, paying close attention to the dimensions and tolerances. For example, a retaining groove must be precisely located and sized to ensure the firing pin is securely held in place.
Step 5: Heat Treatment
Heat treatment is crucial for hardening the firing pin. Without proper hardening, the firing pin will be too soft and will deform or break under repeated impacts. Follow these steps:
- Hardening: Heat the firing pin to the appropriate hardening temperature for the specific type of tool steel you are using. This temperature is typically around 1450-1550°F (790-840°C). Use a furnace or a torch, ensuring even heating.
- Quenching: Quickly quench the heated firing pin in quenching oil. This rapidly cools the steel, hardening it.
- Tempering: After hardening, the firing pin will be very brittle. Tempering reduces the brittleness while maintaining hardness. Heat the firing pin to the appropriate tempering temperature (typically around 400-600°F or 200-315°C) for the desired hardness. Hold it at this temperature for about an hour, then allow it to cool slowly.
Step 6: Finishing and Polishing
After heat treatment, the firing pin may have a rough surface. Use files and sandpaper to smooth and polish the surface. This will improve its appearance and reduce friction during operation. Pay particular attention to the tip of the firing pin, ensuring it is smooth and free of any sharp edges.
Step 7: Final Fitting
The final step is to fit the firing pin to the firearm. Carefully insert the firing pin into its channel in the bolt or receiver. Ensure it moves freely and does not bind. Check the protrusion of the firing pin from the bolt face. This protrusion should be within the manufacturer’s specifications. If the protrusion is too long, the firing pin may pierce primers. If it is too short, it may not ignite the primer reliably. [See also: Adjusting Firing Pin Protrusion]
If necessary, make small adjustments to the firing pin until it fits and functions correctly. This may involve filing or grinding small amounts of material from the firing pin. Be patient and take your time, as this is a critical step for ensuring safety and reliability.
Safety Considerations
Working with firearms and their components requires strict adherence to safety protocols. Always ensure the firearm is unloaded before working on it. Wear safety glasses to protect your eyes from flying debris. Work in a well-ventilated area, especially when heat treating. If you are not comfortable working on firearms, seek the assistance of a qualified gunsmith. Improperly made or installed firing pins can lead to dangerous malfunctions.
Additionally, modifying firearms may be subject to legal restrictions. Be sure to understand and comply with all applicable laws and regulations before making any modifications to your firearm. [See also: Firearm Modification Laws]
Troubleshooting
Even with careful attention to detail, problems can arise when making a firing pin. Here are some common issues and their solutions:
- Misfires: If the firearm misfires, the firing pin may not be striking the primer with sufficient force. Check the protrusion of the firing pin and ensure it is within specifications. Also, check the firing pin channel for any obstructions.
- Pierced Primers: If the firing pin is piercing primers, the tip may be too sharp or the protrusion may be too long. Reduce the sharpness of the tip or shorten the firing pin protrusion.
- Binding: If the firing pin is binding in its channel, it may be too tight. Lightly polish the firing pin and the inside of the channel to reduce friction.
Conclusion
Learning how to make a firing pin can be a rewarding experience for anyone interested in firearms and gunsmithing. By following this guide and taking the necessary precautions, you can create a functional and reliable firing pin for your firearm. Remember to prioritize safety and always double-check your work. A properly made firing pin is essential for the safe and reliable operation of your firearm. Consider seeking guidance from experienced gunsmiths or further educational resources to enhance your understanding and skills. With dedication and attention to detail, mastering the art of how to make a firing pin is within reach.
