Non-Sanded Grout: A Comprehensive Guide to Uses, Application, and Maintenance
When undertaking tiling projects, the selection of the right grout is as crucial as choosing the tiles themselves. One of the most common types of grout is non-sanded grout, prized for its smooth consistency and specific applications. This article delves into the world of non-sanded grout, exploring its uses, application techniques, maintenance tips, and comparisons with other grout types. Whether you’re a seasoned contractor or a DIY enthusiast, understanding the nuances of non-sanded grout is essential for achieving a professional and long-lasting finish.
Understanding Non-Sanded Grout
Non-sanded grout, as the name suggests, does not contain sand particles. This makes it ideal for use with tiles that are closely spaced together, typically less than 1/8 inch. The absence of sand allows the grout to flow smoothly into these narrow joints, creating a seamless and aesthetically pleasing appearance. The composition of non-sanded grout typically includes cement, pigments, and polymers that enhance its flexibility and adhesion.
Ideal Applications
The primary application for non-sanded grout is in areas where tile joints are narrow. This includes:
- Glass Tiles: The smooth surface of glass tiles benefits from the fine texture of non-sanded grout.
- Polished Stone: Materials like marble and granite, which are prone to scratching, are best paired with non-sanded grout to avoid damage during installation.
- Ceramic and Porcelain Tiles with Tight Joints: When these tiles are laid with minimal spacing, non-sanded grout ensures complete filling of the joints.
Choosing the correct grout is essential. Improper grout selection can lead to cracking, crumbling, and ultimately, the need for costly repairs. Using non-sanded grout in wide joints can cause shrinkage and weaken the overall installation.
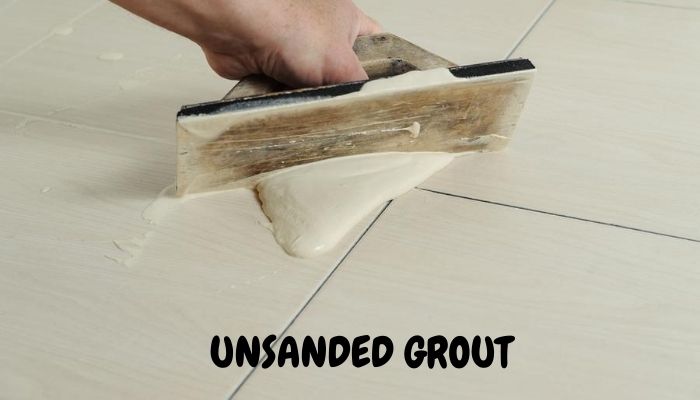
Application Techniques for Non-Sanded Grout
Proper application is key to the performance and appearance of non-sanded grout. Here’s a step-by-step guide:
- Preparation: Ensure the tile surface is clean, dry, and free from debris. Remove any spacers and inspect the joints for obstructions.
- Mixing: Follow the manufacturer’s instructions for mixing the grout. Typically, this involves adding water to the dry grout powder and mixing thoroughly until a smooth, creamy consistency is achieved. Avoid adding too much water, as this can weaken the grout.
- Application: Use a grout float to apply the non-sanded grout to the tile surface. Hold the float at a 45-degree angle and work the grout into the joints, ensuring they are completely filled.
- Removal of Excess Grout: After applying the grout, use the edge of the float to remove excess grout from the tile surface. Work diagonally across the tiles to avoid pulling grout out of the joints.
- Cleaning: After about 15-30 minutes, when the grout has begun to set, use a damp sponge to clean the tile surface. Rinse the sponge frequently and avoid using too much water, as this can weaken the grout and cause discoloration.
- Final Polishing: Once the grout has fully cured (typically 24-72 hours), polish the tile surface with a clean, dry cloth to remove any remaining haze.
It’s crucial to follow the manufacturer’s instructions closely, as variations in product formulations can affect the mixing and curing times. Practice on a small, inconspicuous area first to get a feel for the grout and ensure the color is to your liking. Pay special attention to corners and edges, ensuring they are properly sealed.
Maintenance and Care
Proper maintenance is essential for extending the life and appearance of non-sanded grout. Regular cleaning helps prevent the buildup of dirt, grime, and mildew, which can stain and degrade the grout over time.
Regular Cleaning
Clean non-sanded grout regularly with a mild detergent and water. Avoid using harsh chemicals or abrasive cleaners, as these can damage the grout and tile surfaces. A soft brush or sponge can be used to scrub the grout lines, removing any stubborn dirt or stains.
Sealing
Applying a grout sealer can help protect non-sanded grout from stains and water damage. Sealers penetrate the grout, creating a barrier that repels liquids and prevents them from seeping into the porous material. Reapply sealer every 1-2 years, or as recommended by the manufacturer.
Preventing Mildew
Mildew can be a common problem in damp areas like bathrooms and kitchens. To prevent mildew growth, ensure adequate ventilation and wipe down wet surfaces after use. Use a mildew-resistant cleaner periodically to kill any existing mildew spores. [See also: Bathroom Tile Grout Cleaning Tips]
Non-Sanded Grout vs. Sanded Grout
The primary difference between non-sanded grout and sanded grout is the presence of sand. Sanded grout contains fine sand particles, which provide added strength and prevent shrinkage in wider grout joints. Here’s a comparison:
- Joint Width: Non-sanded grout is best for joints less than 1/8 inch, while sanded grout is suitable for joints 1/8 inch or wider.
- Strength: Sanded grout is stronger and more resistant to cracking due to the presence of sand.
- Scratch Resistance: Non-sanded grout is less likely to scratch delicate tile surfaces.
- Cost: Generally, non-sanded grout is more expensive than sanded grout.
- Texture: Non-sanded grout has a smooth, creamy texture, while sanded grout has a slightly rougher texture.
Choosing between non-sanded grout and sanded grout depends on the specific requirements of the tiling project. Consider the tile type, joint width, and desired aesthetic when making your decision. Using sanded grout when non-sanded grout is appropriate can lead to scratching and an unprofessional look. Conversely, using non-sanded grout in wider joints can cause the grout to crack and crumble over time.
Color Considerations for Non-Sanded Grout
The color of the non-sanded grout can significantly impact the overall appearance of the tiled surface. Consider the following when selecting a grout color:
- Matching the Tile: Choosing a grout color that closely matches the tile can create a seamless and uniform look.
- Contrasting the Tile: Selecting a contrasting grout color can highlight the individual tiles and create a more dynamic and visually interesting design.
- Neutral Colors: Neutral grout colors like white, gray, and beige are versatile and can complement a wide range of tile styles.
- Dark Colors: Dark grout colors can hide dirt and stains more effectively, making them a good choice for high-traffic areas.
Always test the grout color on a small, inconspicuous area before applying it to the entire surface. Colors can appear different depending on the lighting and surrounding environment. Also, consider the potential for grout discoloration over time, especially in areas exposed to moisture and chemicals.
Troubleshooting Common Issues
Even with careful application, issues can sometimes arise with non-sanded grout. Here are some common problems and their solutions:
- Cracking: Cracking can occur if the grout is mixed improperly, applied too thinly, or exposed to excessive stress. Remove the cracked grout and reapply a fresh batch.
- Discoloration: Discoloration can be caused by moisture, chemicals, or dirt. Clean the grout with a mild detergent and water, and apply a grout sealer to prevent future discoloration.
- Shrinkage: Shrinkage can occur if the grout is not properly compacted into the joints. Remove the shrunken grout and reapply, ensuring the joints are completely filled.
- Efflorescence: Efflorescence is a white, powdery deposit that can appear on the grout surface. It is caused by mineral salts migrating to the surface. Clean the grout with a mild acid solution and apply a grout sealer to prevent recurrence.
Addressing these issues promptly can prevent further damage and maintain the appearance and integrity of the tiled surface. If you encounter persistent problems, consult a professional tile installer for assistance.
Advanced Techniques and Considerations
For more complex tiling projects, consider these advanced techniques and considerations when using non-sanded grout:
- Epoxy Grout: For high-traffic or moisture-prone areas, consider using epoxy grout instead of non-sanded grout. Epoxy grout is more durable, stain-resistant, and water-resistant.
- Grout Additives: Additives can be added to non-sanded grout to enhance its performance and properties. For example, latex additives can improve flexibility and adhesion.
- Heated Floors: When tiling over heated floors, use a flexible grout that can accommodate the expansion and contraction caused by temperature changes.
- Large Format Tiles: When using large format tiles, ensure the substrate is perfectly level to prevent stress on the grout joints.
Conclusion
Non-sanded grout is a versatile and essential material for tiling projects, particularly those involving narrow joints and delicate tile surfaces. By understanding its properties, application techniques, and maintenance requirements, you can achieve a professional and long-lasting finish. Remember to choose the right grout for the job, follow the manufacturer’s instructions carefully, and maintain the grout regularly to ensure its longevity. Whether you’re a homeowner tackling a DIY project or a professional contractor, mastering the use of non-sanded grout is a valuable skill that will enhance the beauty and durability of your tiled surfaces. By following the guidelines outlined in this article, you can confidently tackle any tiling project with non-sanded grout and achieve exceptional results.
